
Quick Tips
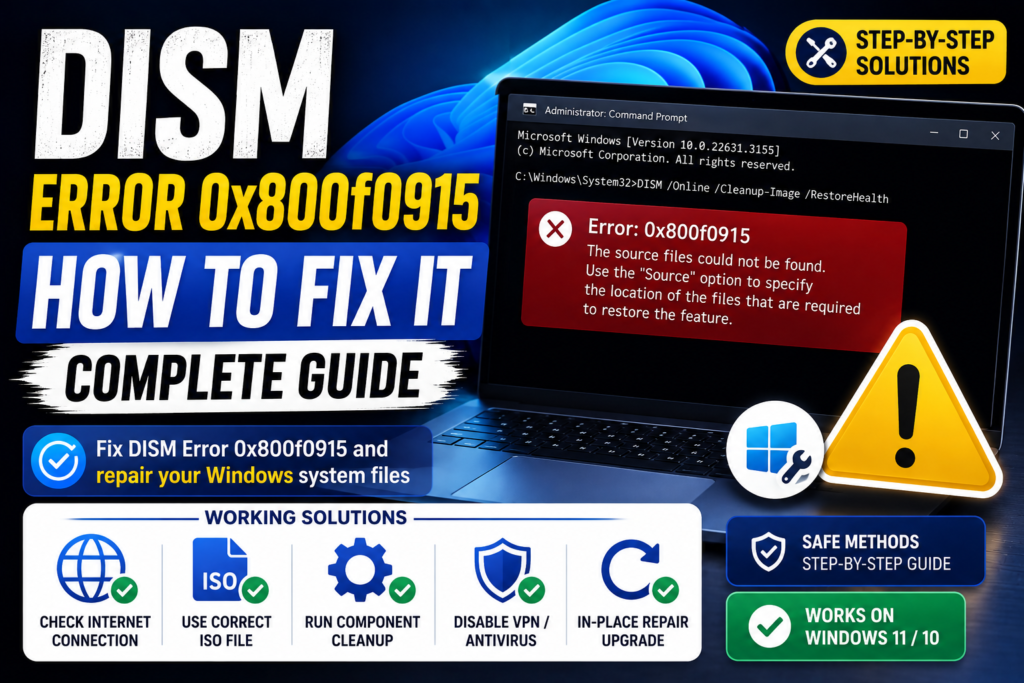
- DISM Error 0x800f0915 usually appears when Windows cannot find the required repair files.
- Run DISM from an elevated Command Prompt with administrator privileges.
- Check your internet connection and Windows Update before using an offline repair source.
- If Windows Update cannot provide the required files, use a matching Windows 11 ISO.
- An in-place repair upgrade can be the final option if DISM still cannot repair the system.
The Deployment Image Servicing and Management tool, better known as DISM, is built into Windows and is commonly used to repair corrupted or damaged system components. However, you may sometimes encounter DISM Error 0x800f0915 when running a repair command.
The error can indicate that Windows could not find the required repair content. This often happens when DISM cannot download the necessary files through Windows Update or when the available repair source does not match your installed version of Windows.
Fortunately, there are several ways to fix DISM Error 0x800f0915.
What Causes DISM Error 0x800f0915?
The error can occur for several reasons, including:
- Windows Update cannot provide the required repair files
- An unstable or blocked internet connection
- A VPN, firewall, or security application interfering with Windows Update
- A mismatched Windows ISO being used as the repair source
- Corrupted Windows component files
- Problems with the Windows component store
Before trying the more advanced solutions, make sure you are using Command Prompt as an administrator.
Fix 1 – Check Your Internet Connection
DISM can use Windows Update to obtain missing repair files. If your internet connection is unstable or Windows Update cannot communicate with Microsoft’s servers, the repair process may fail.
Step 1.
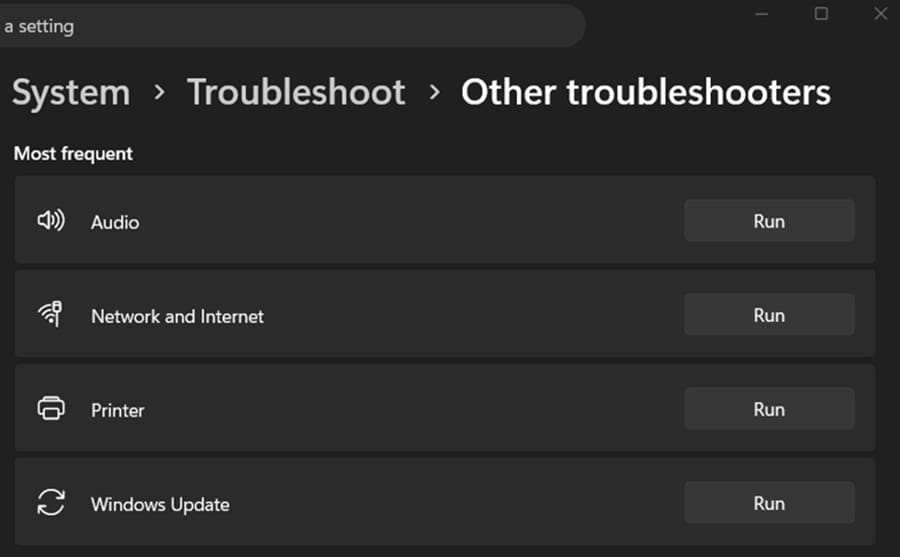
Open Settings and go to System > Troubleshoot > Other troubleshooters.
Step 2.
Find Network and Internet if it is available and run the troubleshooter.
You can also right-click the network icon on the taskbar and select the available option for diagnosing network problems.
Step 3.
If you use a third-party VPN, firewall, or security application, temporarily disable it and try the DISM command again.
Step 4.
Open Command Prompt as administrator and run your DISM repair command again.
If the error continues, move on to the next solution.
Fix 2 – Use a Matching Windows ISO as the DISM Repair Source
If Windows Update cannot provide the required files, you can use a Windows installation ISO as an offline repair source.
The important part is that the ISO should match your installed Windows version and edition as closely as possible.
Step 1.
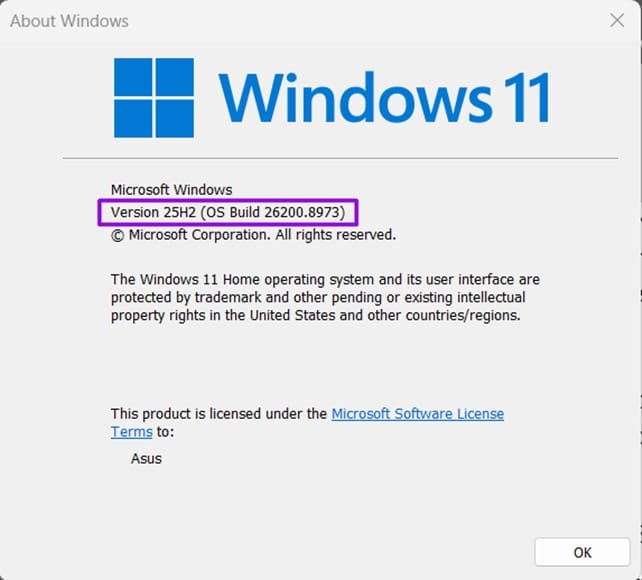
Press Win + R, type winver, and press Enter.
Check your Windows version and build number.
Step 2.
Download the appropriate Windows 11 installation ISO from Microsoft’s official website and mount it by double-clicking the ISO file.
Step 3.
Open the mounted drive and go to the Sources folder.
Look for either:
install.wim
or
install.esd
Also note the drive letter assigned to the mounted ISO.
Step 4.
Open Command Prompt as administrator and check the available Windows editions inside the image.
For an install.wim file, use:
DISM /Get-WimInfo /WimFile:X:\sources\install.wimReplace X: with the drive letter of your mounted ISO.
If the ISO contains install.esd, use:
DISM /Get-WimInfo /WimFile:X:\sources\install.esdStep 5.
Find the index number corresponding to your Windows edition, such as Windows 11 Home or Windows 11 Pro.
Step 6.
Run the repair command using the appropriate image and index.
For install.wim:
DISM /Online /Cleanup-Image /RestoreHealth /Source:WIM:X:\sources\install.wim:INDEX /LimitAccessFor install.esd:
DISM /Online /Cleanup-Image /RestoreHealth /Source:ESD:X:\sources\install.esd:INDEX /LimitAccessReplace X: with your ISO drive letter and INDEX with the correct edition number.
The /LimitAccess option prevents DISM from attempting to contact Windows Update and forces it to use the specified repair source.
Fix 3 – Run DISM Component Cleanup
The Windows component store can accumulate outdated or unnecessary components over time. Cleaning it up may resolve problems that prevent DISM from completing its repair.
Step 1.
Open Command Prompt as administrator.
Step 2.
Run:
DISM.exe /Online /Cleanup-Image /StartComponentCleanupStep 3.
Wait for the operation to complete. Depending on your system, this may take several minutes.
Step 4.
Restart your computer.
Step 5.
Open an elevated Command Prompt again and run:
DISM /Online /Cleanup-Image /RestoreHealthIf Windows Update still cannot provide the required files, try the ISO-based repair method from Fix 2.
Fix 4 – Perform an In-Place Repair Upgrade
If none of the previous solutions work, an in-place repair upgrade can replace damaged Windows system files while allowing you to keep your personal files and installed applications.
However, it is still recommended that you back up important files before starting the process.
Step 1.
Download the appropriate Windows 11 installation media from Microsoft’s official website.
Step 2.
Mount the Windows ISO by double-clicking it.
Step 3.
Open the mounted drive and run Setup.exe.
Step 4.
Follow the Windows Setup instructions.
When prompted what you want to keep, select:
Keep personal files and apps
Step 5.
Continue with the installation and allow Windows to complete the repair upgrade.
Your computer may restart several times during the process.
Once Windows has finished, try running the DISM command again.
Final Thoughts
DISM Error 0x800f0915 generally means that DISM cannot locate the repair content it needs to restore Windows components. Starting with your internet connection and Windows Update is the easiest approach.
If that fails, using a matching Windows ISO as an offline repair source is usually the more reliable solution. Component cleanup can also help when the Windows component store is causing problems.
If DISM continues to fail after these troubleshooting steps, an in-place Windows repair upgrade can replace damaged system files without requiring a complete clean installation.