
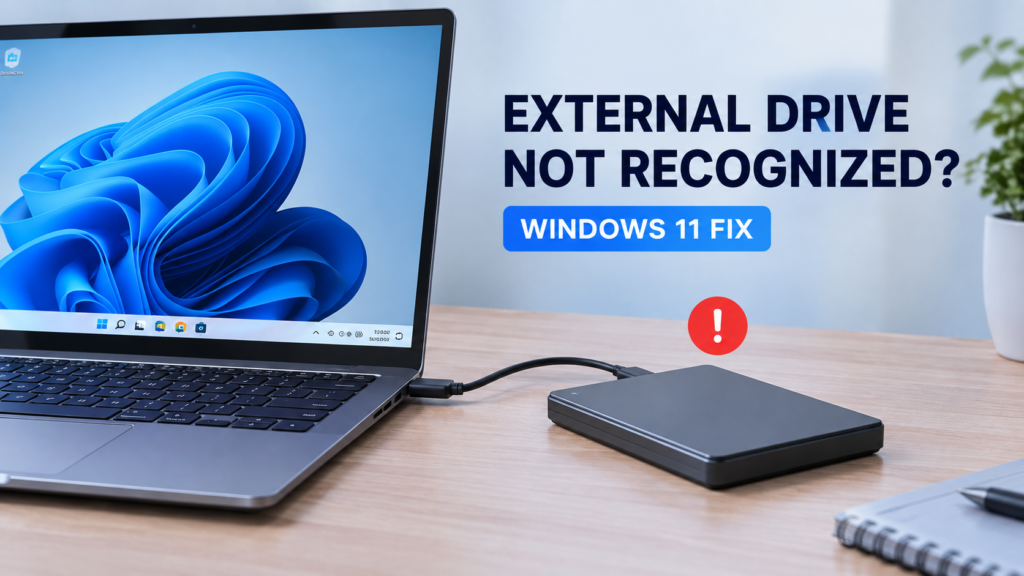

External hard drives, USB flash drives, SD card readers, and other removable storage devices make it easy to move files between computers. However, problems can occur if a drive is disconnected while Windows is still accessing it.
If your external hard drive was working normally but is no longer recognized after you ejected it, don’t panic. The problem may be caused by a temporary USB connection issue, a missing drive letter, or Windows still treating the device as safely removed.
Windows provides a built-in Safely Remove Hardware and Eject Media option specifically to prevent data loss when disconnecting external storage.
Here are several ways to get your external drive working again.
Quick Tips
- Always use Eject or Safely Remove Hardware before disconnecting an external storage device.
- Restart your computer if Windows stops recognizing the drive after it has been ejected.
- Try another USB port and, if possible, another USB cable.
- Check Disk Management if the drive doesn’t appear in File Explorer.
- If the drive works on another computer, the problem may be related to your Windows PC or USB connection.
Why Is My External Hard Drive Not Recognized After Ejecting?
There are several possible reasons why Windows may stop detecting an external drive after it has been removed.
A temporary USB controller problem, an incomplete device removal, a changed drive letter, a faulty cable, or a problem with the external drive itself can all cause the issue.
Windows also provides different ways to safely remove hardware. When you select Eject, Windows prepares the device for removal and displays a confirmation when it is safe to disconnect it.
If the drive was disconnected unexpectedly, try the following fixes.
Fix 1: Restart Your Computer
The easiest solution is to restart Windows.
If the USB device or controller has become stuck after the drive was ejected, restarting the computer can reload the hardware and its associated drivers.
Here’s what to do:
- Disconnect the external hard drive from your PC.
- Save any open work.
- Open Start.
- Select Power.
- Click Restart.
- Wait for Windows to boot completely.
- Connect the external drive again.
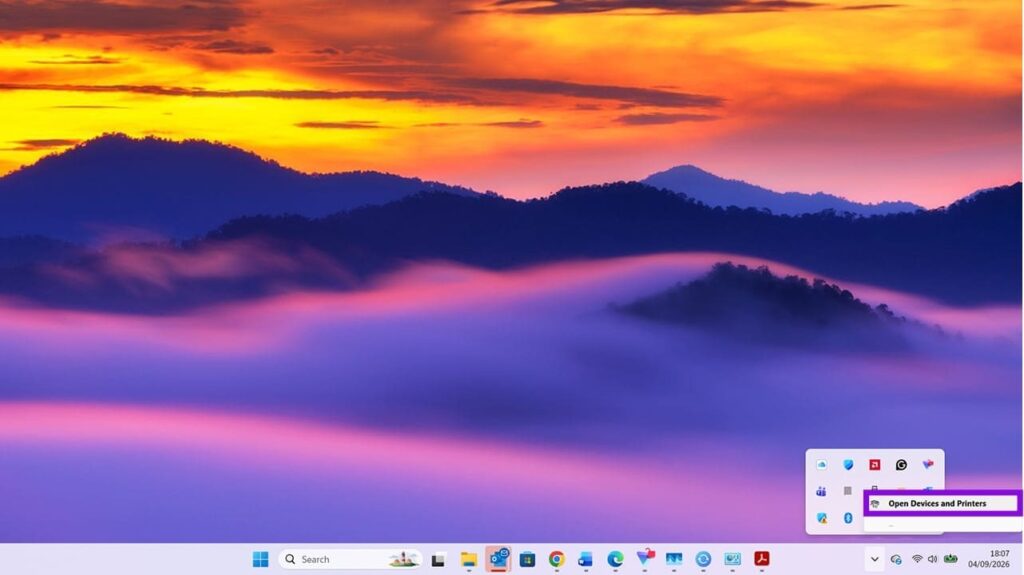
Check File Explorer > This PC to see whether the drive appears.
If it still doesn’t show up, move on to the next fix.
Fix 2: Try a Different USB Port
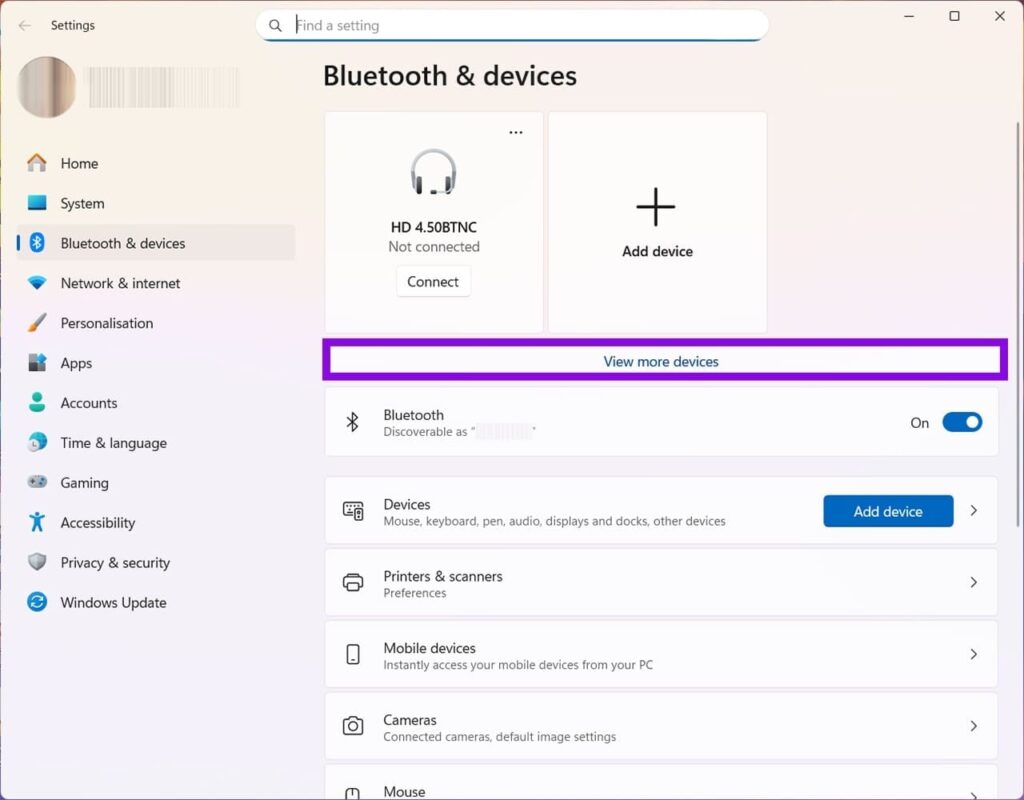
A faulty or temporarily unresponsive USB port can prevent Windows from detecting your external drive.
Disconnect the drive and connect it to another USB port on your computer.
If you’re using a USB hub, remove the hub temporarily and connect the drive directly to the computer.
Microsoft also recommends trying another USB port and checking the cable when troubleshooting USB-connected hardware.
If your external hard drive uses a removable USB cable, try another compatible cable as well.
Fix 3: Check the Drive in Disk Management
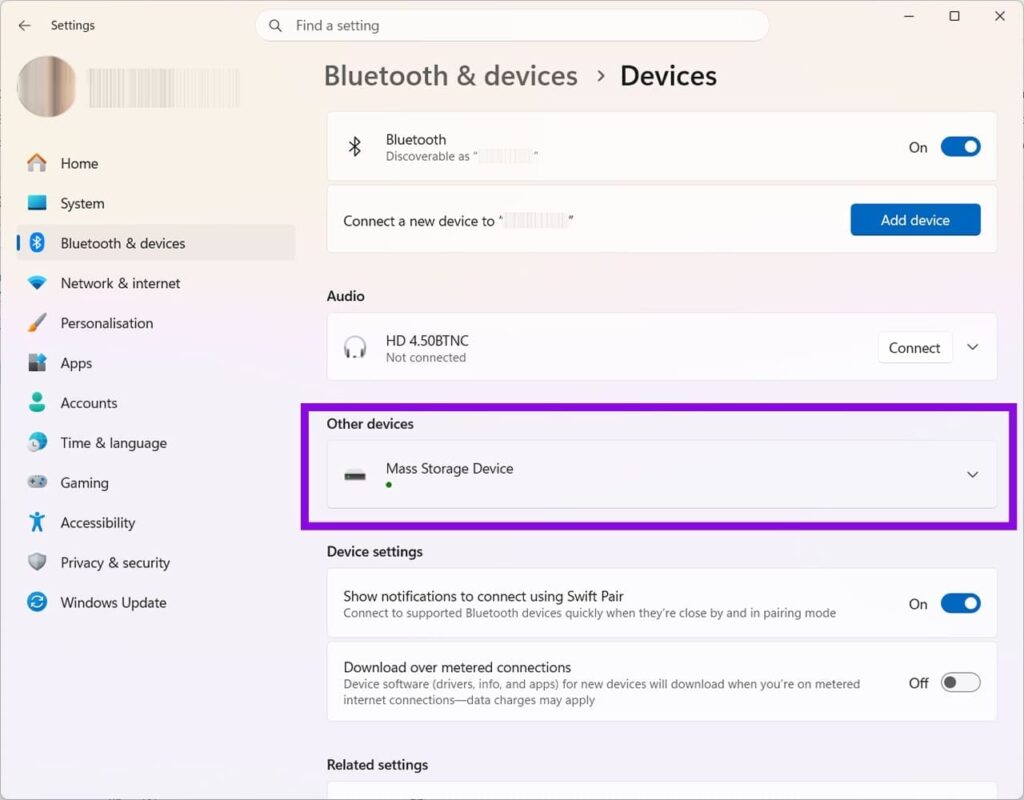
Sometimes Windows detects the physical drive but doesn’t display it in File Explorer.
Disk Management can help determine whether Windows can still see the drive.
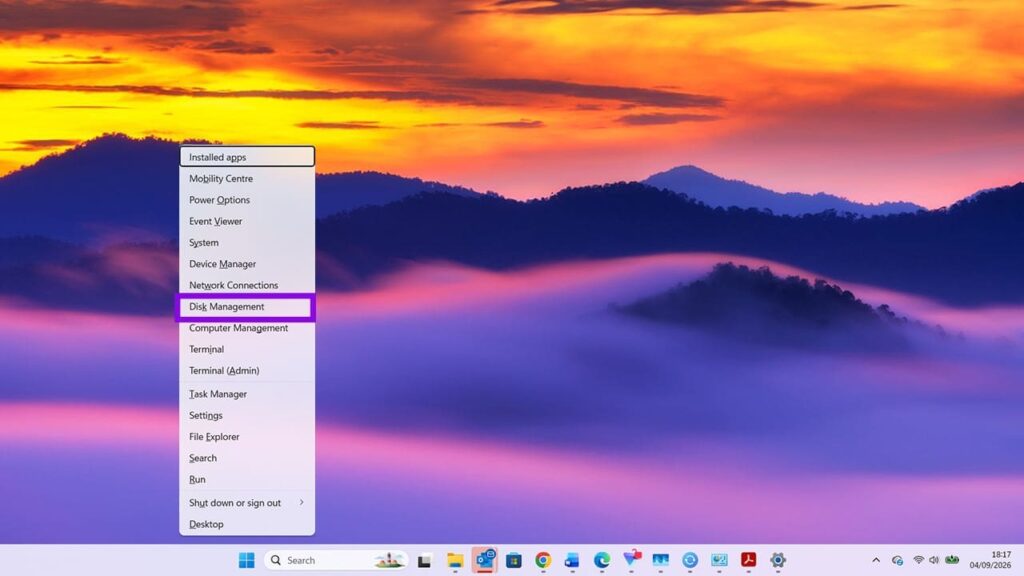
Step 1: Open Disk Management
Press Windows + X.
Select Disk Management.
Alternatively, search for Create and format hard disk partitions from Windows Search.
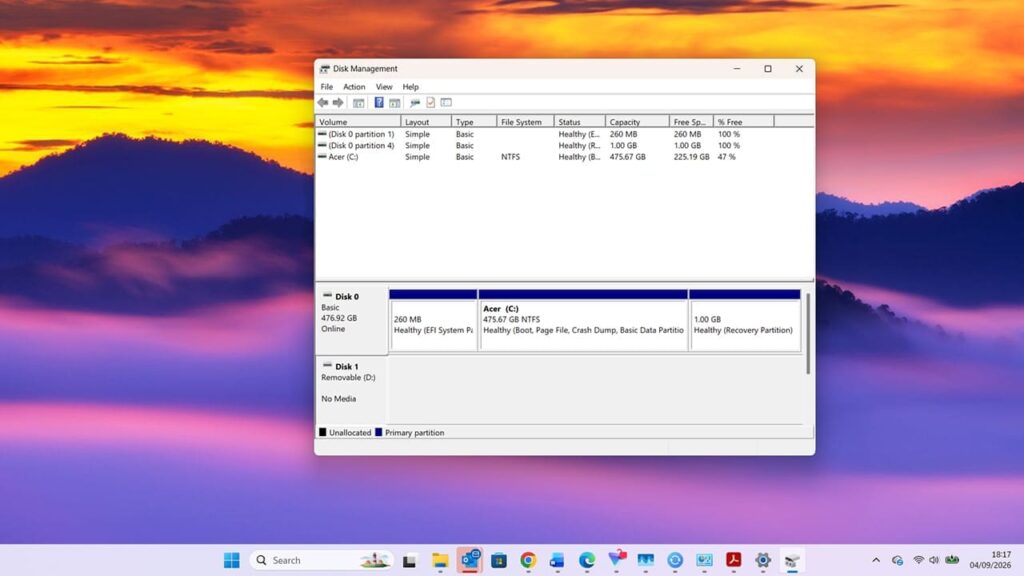
Step 2: Find Your External Drive
Look through the disks listed at the bottom of the Disk Management window.
Your external drive may appear as a disk without a drive letter.
For example, Windows might detect it as:
Disk 1 — Healthy — 1 TB
but it may not appear under This PC.
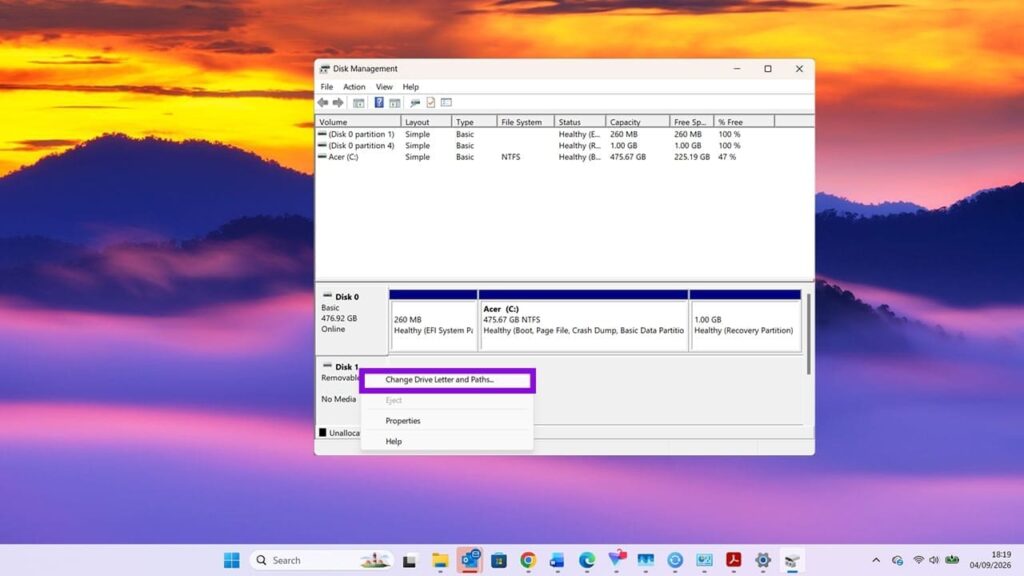
Step 3: Assign a Drive Letter
If the partition is visible but doesn’t have a drive letter:
- Right-click the external drive’s partition.
- Select Change Drive Letter and Paths.
- Click Change.
- Select an unused drive letter.
- Click OK.
- Confirm the change.
Now open File Explorer and check whether the drive appears.
Important: Do not format the drive simply because Windows displays an unfamiliar status. Formatting can erase data.
Fix 4: Disconnect and Reconnect the Drive
If Windows still doesn’t recognize the device, completely disconnect it and reconnect it.
For a USB-powered drive:
- Unplug the drive.
- Wait several seconds.
- Connect it to another USB port.
- Wait for Windows to detect it.
- Open File Explorer and check This PC.
If the drive has its own power adapter, make sure the adapter is connected and the drive is powered on.
Fix 5: Check Whether the Drive Works on Another Computer
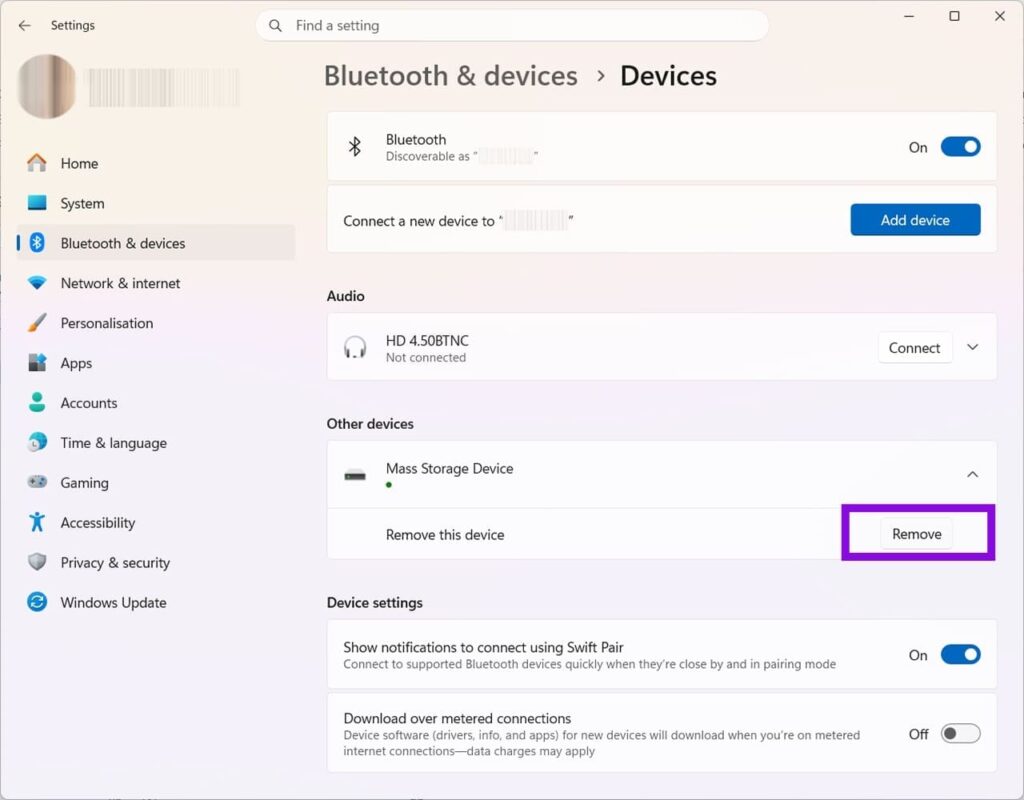
This is one of the easiest ways to determine whether the problem is with the drive or your computer.
Connect the external hard drive to another Windows PC.
If the drive works on another computer
The external drive itself may be fine. The issue could be related to:
- Your USB port
- USB drivers
- Windows device detection
- The original computer’s USB controller
- A temporary Windows hardware problem
If the drive doesn’t work anywhere
The problem may be with the drive, cable, enclosure, or power supply.
If the drive contains important files, avoid repeatedly formatting or modifying it until you’ve determined whether the data is recoverable.
Fix 6: Check the Device in Device Manager
Device Manager can help you determine whether Windows is detecting the USB hardware.
Step 1: Open Device Manager
Press Windows + X and select Device Manager.
Step 2: Expand Disk Drives
Expand Disk drives.
Look for your external hard drive.
You can also expand Universal Serial Bus controllers and look for USB-related devices.
Step 3: Check for Problems
If you see a warning icon next to the device, right-click it and select Properties to check the device status.
Windows uses Device Manager to report hardware problems and associated error codes.
If necessary, you can restart the computer and allow Windows to detect the hardware again.
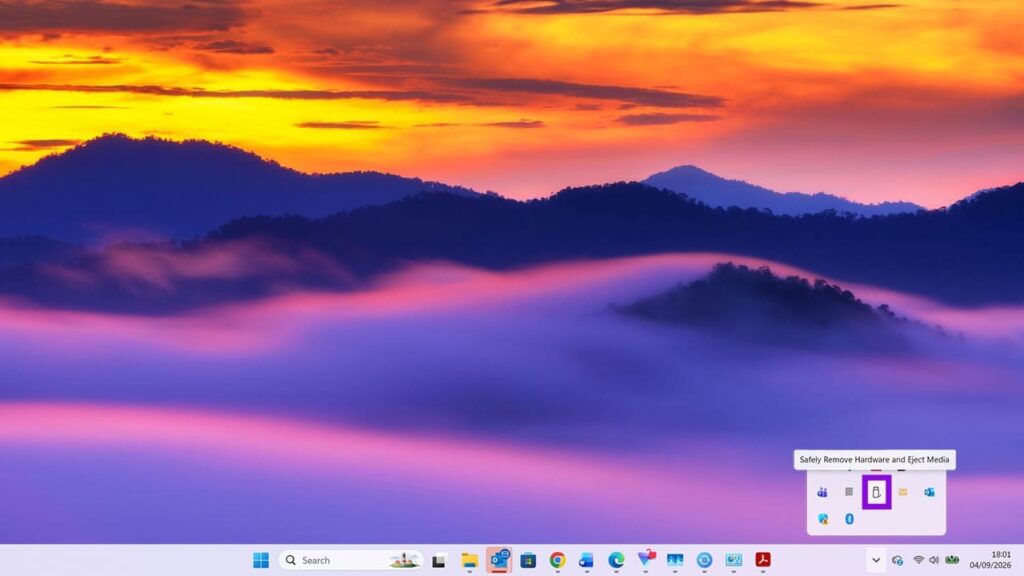
How to Safely Eject an External Drive in Windows 11
To prevent problems in the future, always safely remove your external storage before unplugging it.
Method 1: Use the System Tray
- Look at the notification area on the Windows taskbar.
- Select the Show hidden icons arrow if necessary.
- Find Safely Remove Hardware and Eject Media.
- Right-click the icon.
- Select your external drive.
- Wait for Windows to display Safe To Remove Hardware.
- Disconnect the drive.
Microsoft recommends this method for safely removing USB flash drives and external hard drives.
Method 2: Use File Explorer
Depending on the device and Windows configuration, you may also be able to right-click the removable drive in File Explorer and select Eject.
Wait until Windows finishes the operation before physically disconnecting the drive.
What If Windows Says the Drive Is Still in Use?
Sometimes Windows won’t allow an external drive to be ejected because a file or application is still accessing it.
First, close any files stored on the external drive.
Then close applications that may be using those files, including:
- File Explorer windows
- Media players
- Backup software
- Photo or video editing applications
- Document editors
- Command Prompt or PowerShell windows opened to the drive
Try the eject process again.
If Windows continues to report that the device is in use, restarting the computer can help release the connection.
Don’t Format the Drive Too Quickly
If your external drive suddenly disappears from File Explorer, you may see a Windows message asking you to format the disk.
Don’t immediately click Format if the drive contains important files.
Formatting can remove the existing file system and make data recovery more difficult.
Instead, first check:
- Whether the drive appears in Disk Management
- Whether it works with another USB port
- Whether another cable works
- Whether another computer recognizes it
Final Thoughts
An external hard drive that isn’t recognized after being ejected doesn’t necessarily mean the drive is damaged.
Start with simple solutions such as restarting Windows, changing the USB port, checking the cable, and reconnecting the drive. If Windows detects the drive but it doesn’t appear in File Explorer, check Disk Management and look for a missing drive letter.
For future use, always select Eject or Safely Remove Hardware before physically disconnecting removable storage. This helps reduce the risk of data loss and corrupted files.
If the drive fails to appear on multiple computers and different cables or ports don’t help, the problem may be hardware-related and you should prioritize protecting or recovering the data rather than repeatedly reconnecting or formatting the drive.


Pingback: Unable to connect to localhost MySQL workbench - Techhowlab